第一次写教程,可惜我的PS是英语,因此我只能够写英语了。 不明白的可以去Google Translate一下。If don’t understand, can leave message to ask me.
🙂
have a nice day.
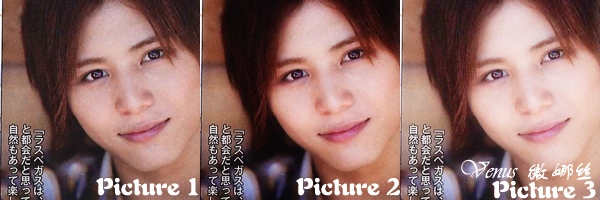
Picture 1 is the original picture
1。Arrange the picture at the favored place, at right hand side, right click on the picture and select “Duplicate Layer”.
2。Select “Filter” -> “Blur” -> “Gaussian Blur”, Radius: 5.0 pixels, click ok
3。At bottom right hand side “Layers” section, select “Soft Light” for the picture which had already been blur.
Done. (Picture 2)
If the output is dark,Please try the steps below
1。At bottom right conner there have 7 small icons, click the second icon from the right, that icon is create a new layer
2。At the top left conner, select “Edit” -> “Fill” -> “Use: While” -> “OK”
3。At the bottom right hand side, “Layer” section, select “Soft Light” Mode for the white layer.
ps: If too light, can adjust the “Opacity” from 100% to other percentage. (Opacity is located at the bottom right hand side, “Layer” Section.)
Done. (Picture 3)
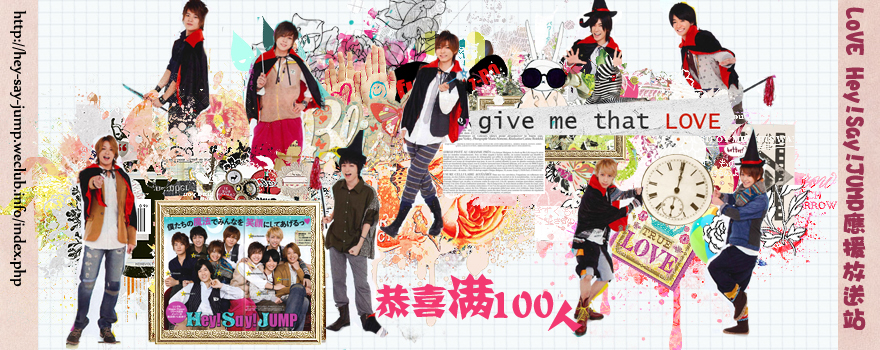 一个是LHSJ的版头,小娃终于尝试了这种风格了, 感觉还不错吧? 之前在HSJ PS World那里就有看过这种手法了,之前也说过找到类是这样的素材, 所以现在就拿来尝试了。 幸好是10个人的团体,所以就不会觉得不够图,也不会觉得太多图,这个数目,刚刚好。
 为什么小娃说第一次呢?
 其实小娃本身认为如果不加素材应该会更好呀~~